I originally found out how to do this from Torley’s web site, but when I went to look for it tonight, it had been moved or deleted, but I found the images on Flickr.
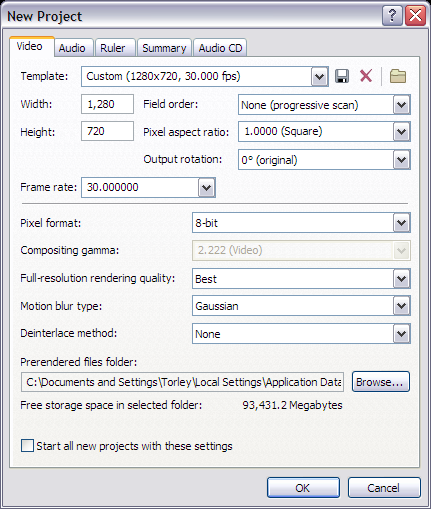
I’m assuming that you have a method to set your viewer window to the right size. In Viewer 2.x there is an option on the Advanced Menu that allows you to set it, I use 1280 x 720.
When you open Vegas, it’s probably best to start a new project with the HD settings before you start importing any video or audio.
I have that “Start all new projects…” button set permanently now.
Now it’s down to you to edit your video.
Once you have finished editing and compositing, it’s time to render the video. From the File Menu choose “Render As…”
In the “Save as type” box, choose Windows Media Video and then hit “Custom”
You can give your render template a name in the top box and choose “Best” for “Video rendering quality”.
Click on the Audio tab at the bottom and check your audio settings are like those above.
Same thing for the video tab.
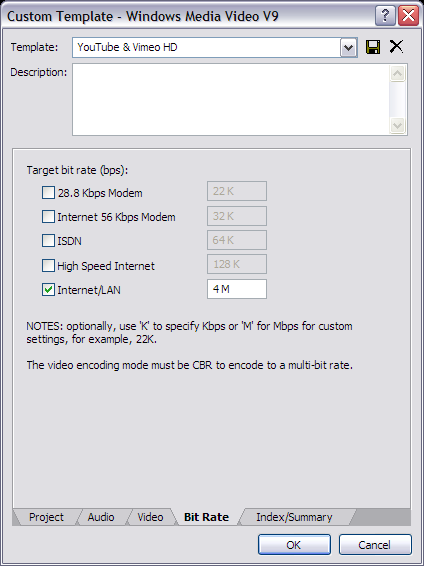
And once again for the Bit Rate tab.
At this point you should hit the Save icon next to the Template box at the top to save these settings for later use. You can then hit OK, which will take you back to the previous “Render As” window where you can choose a file name and click “Save” to render your video.
The images in this post are by Torley and are reproduced under a Creative Commons Attribution-ShareAlike 2.0 Generic license.


